Docker使用中遇到的一些问题
介绍
- 这里列出本人遇到的一些问题以及解决办法
- 部分图片来源网络
创建镜像时遇到的报错
- 网络因素导致创建失败
docker使用国外资源容易出这种问题“ERROR: failed to solve: Canceled: context canceled”
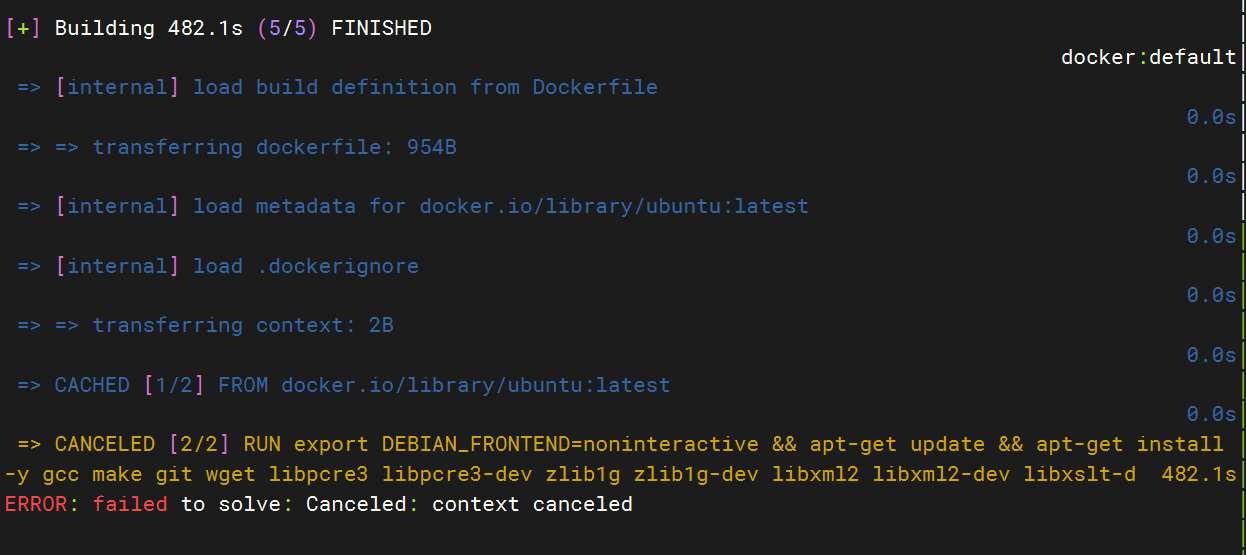
解决:- 如果网络不稳定,那么多试几次就可以
- 如果是网络不行导致直接无法访问,那只能挂代理了
“fatal: unable to access ‘https://github.com/xxxxxxxx/‘: GnuTLS recv error (-110): The TLS connection was non-properly terminated.”
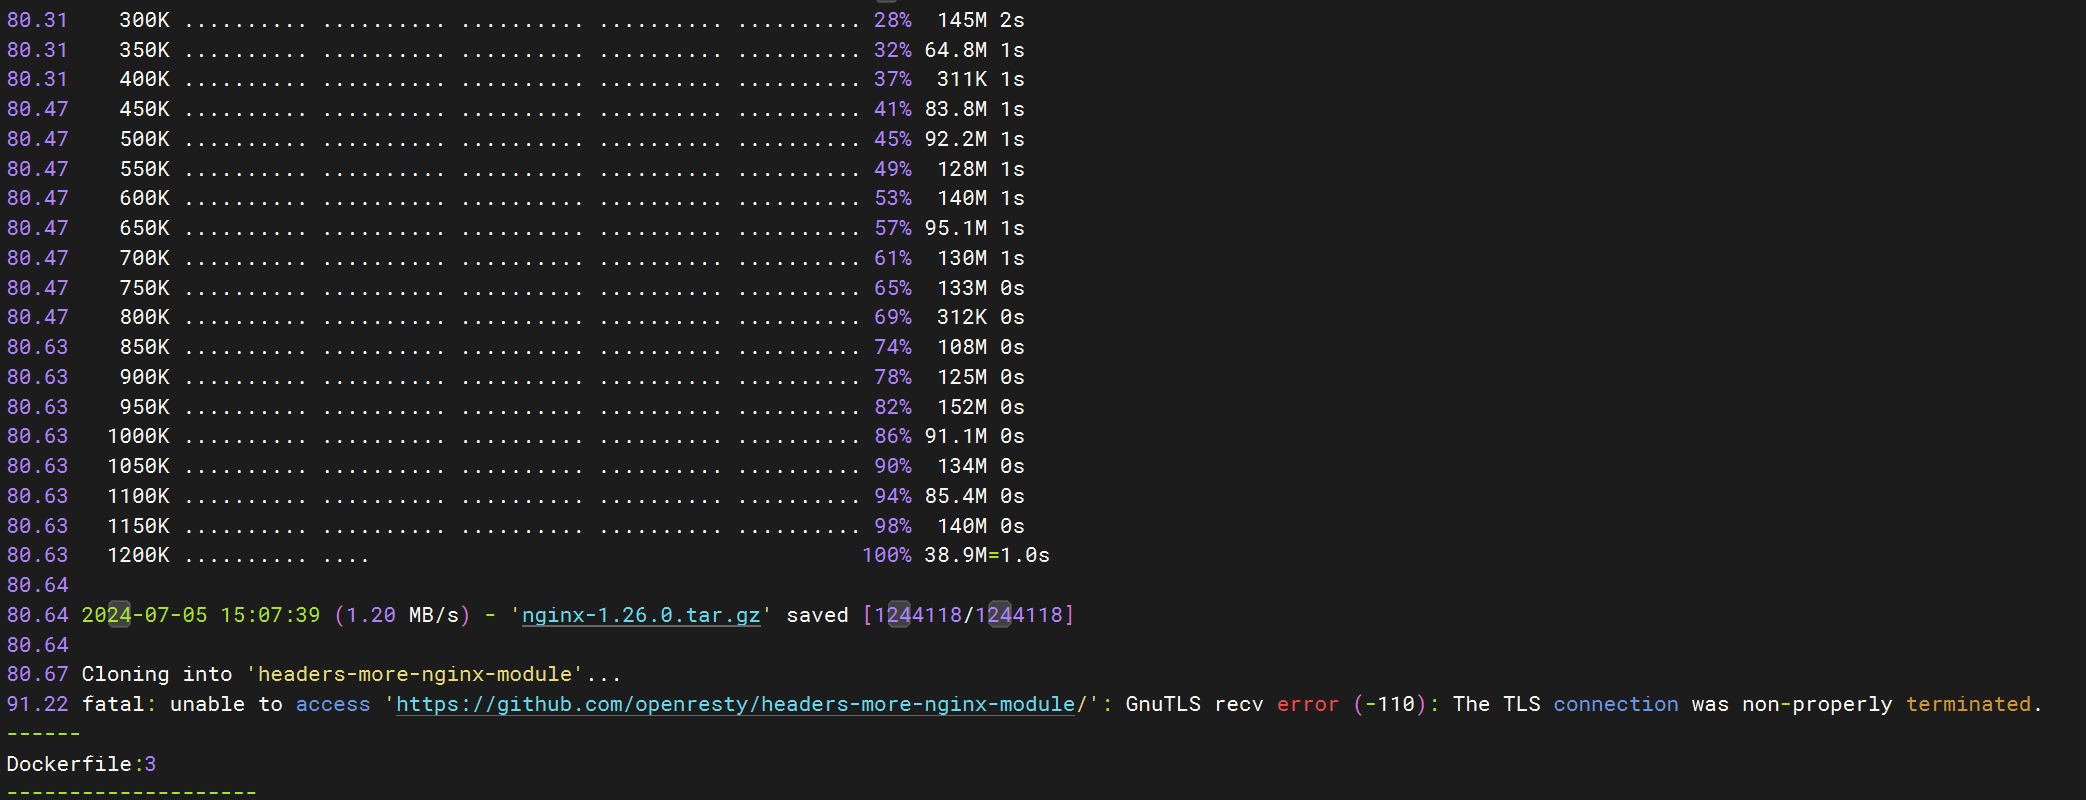
解决:- 这种是因为使用的代理没有证书,从而导致git在下载的时候校验不通过
- 取消代理即可,或者使用有认证的代理
系统上执行reboot命令非常慢
这里没有截图了,从控制台可以看到是卡住在系统的下电流程
然后这里有个点就是,如果在执行reboot命令之前先将docker停掉:systemctl stop docker
接着再去执行重启命令就不会卡住,所以可以确认就是因为docker导致的卡住
至于什么原因没有细究,这里列一下当前解决方法:
- 修改reboot命令,让其在执行真正
reboot命令之前先停掉docker服务 - 这个现象还和系统上开启了swap导致的,如果环境上没有swap,那么基本不会出现这个问题,也就是关闭swap即可:
swapoff -a
无法访问其他docker容器的服务
容器之间是相互隔离的,但是如果容器存在自己的ip,也是可以互相访问的
通过docker inspect xxx | grep -i ipaddress命令可以查询该实例的ip,然后进行访问即可
参考:
无法访问主机localhost的服务
localhost也就是127.0.0.1是内部地址,容器内是容器的,主机是主机的,那么容器内如何访问主机
在容器内要访问主机的127.0.0.1,直接访问host.docker.internal即可
创建一个桥接网络
下面的localNet是网络名字,可自行修改;关于192.168.0.0这个子网,也可以自行定义.
默认按照下面的命令,执行后将可以通过192.168.0.1访问宿主机.
1 | docker network create -d bridge --subnet 192.168.0.0/24 --gateway 192.168.0.1 localNet |
使用192.168.0.1替换127.0.0.1,如http://192.168.0.1:9200
参考:
容器中出现大量僵尸进程
这个发现是在node相关容器中,执行后的命令不会被回收,从而出现僵尸进程
正常情况下,僵尸进程应该由其父进程处理,如果父进程提前于子进程结束,则由1号进程处理
而Nodejs进程本身不具备清理僵尸进程的能力,所以其不适合做为1号进程(当docker命令直接由node相关命令启动)
官方也有相关介绍
推荐在拉起相关docker时使用--init参数
1 | docker run -it --init node |
这种启动方式会以/sbin/docker-init为1号进程,不会把Dockerfile中CMD作为第一个启动进程,从而可以解决这类问题!
参考:
Docker数据缓存目录
正常情况下,我是在/etc/docker/daemon.conf目录下通过data参数修改了默认存储路径
但是最近发现有的环境上docker的所有镜像和数据占用在/var/lib/containerd目录下,然后占满了根分区。。。
首先可以确认的是这个目录是containerd.service使用的,并且所有环境上这个服务都是拉起来的
然后查看了分别存储在docker目录下和container目录下的环境差异:
- 物理机 - Docker Engine
- Docker version 29.0.2, build 8108357
- docker info差异部分:
1
2
3
4
5
6
7
8
Server Version: 29.0.2
Storage Driver: overlay2
Backing Filesystem: extfs
Supports d_type: true
Using metacopy: false
Native Overlay Diff: true
userxattr: false
Logging Driver: json-file - docker images查看到镜像的占用
1
2
3
4
5
6
7
IMAGE ID DISK USAGE CONTENT SIZE EXTRA
alpine:latest 706db57fb206 8.32MB 0B
dexidp/dex:latest 3d6c73f6ff56 141MB 0B
excalidraw-full:latest e3db90a71dcf 72.7MB 0B
gitlab/gitlab-ce:18.6.0-ce.0 0a28c9a23ce4 3.91GB 0B
golang:alpine f86e735e7a39 215MB 0B
nginx-php:latest 14499e364bbc 21.3MB 0B
- 虚拟机 - Docker Engine
- Docker version 29.0.0, build 3d4129b
- docker info差异部分:
1
2
3
4
Server Version: 29.0.0
Storage Driver: overlayfs
driver-type: io.containerd.snapshotter.v1
Logging Driver: json-file - docker images查看到镜像的占用
1
2
3
4
5
6
7
IMAGE ID DISK USAGE CONTENT SIZE EXTRA
editenv:ubuntu 00eb7cee2598 1.74GB 405MB
nginx:latest c881927c4077 255MB 61.2MB
postgres:18-alpine b40d931bd0e7 396MB 110MB
swift:latest ce273f554d65 5.04GB 1.18GB
ubuntu:latest cd1dba651b30 139MB 28.9MB
vapor:latest a6b3d3239170 326MB 80.2MB
在网上没有找到相关明确的说明,去官方问了下文档AI,总结如下:
我的理解是虚拟机和物理机安装Docker Engine使用的运行时环境是不一样的,所以存在这个差异,包括物理机如果安装的是桌面版Docker Desktop,和虚拟机是一样的
解决办法
将containerd服务的缓存数据目录一并修改掉:
1 | # 修改配置文件 /etc/containerd/config.toml |
更新日志
2026-1-24
增加容器数据占用目录相关说明和配置
2025-12-16
增加容器内僵尸进程处理章节